Saturday, November 28, 2015

Shop Small - Mini Wooden Sign Gifts

It's Small Business Saturday!

Check out these mini hand-lettered wooden signs that make great Christmas gifts. As a thank you for supporting this grad student artist, I'm offering FREE SHIPPING and a FREE handmade Christmas card if you order by December 5th.

Want a custom sign? A personalized gift?
Email me at amandaleelettering@gmail.com to order!


Thank you for shopping local and supporting makers, dreamers, and doers!

With love,

Friday, November 27, 2015

DIY Flower Crown Friday

Just kidding, I'll wear a flower crown any day of the week, whenever I get the chance. This plum, cream, mustard, and forest green crown was fall-inspired and I LOVE how it turned out!
Darcie Moningka Photography
As many of you already know, I love crafts and DIY projects. I've always wanted to blog about my projects to share tutorials and tips for fellow DIY-ers, so here we go!

F L O W E R  C R O W N  tutorial

Darcie Moningka Photography
Materials:

+ Fake flowers & leaves (find them at Michael's + Joann's)
+ Paper stem floral wire (it is usually wire wrapped in brown paper, sold in a roll or pre-cut pieces)
+ Hot glue gun
+ Scissors
+ Wire cutters
+ Twine

How to:
  1. Create the base of your crown by bending the wire to wrap around your head: I used a pre-measured piece of floral wire for an adjustable crown, so that the crown is half wire and half twine. If you want the flowers to go all the way around your head (and not just halfway like mine), create the base from just wire and secure the ends to make a circle.
  2. Bend the ends of the wire to create a "hook" shape. This prevents the wire from poking your head and will be where you attach the twine. 
  3. Cut a piece of twine and knot it onto both "hooks" on the crown. This allows for an adjustable fit.
  4. Choose your flowers + leaves: use scissors (or wire cutters if necessary) to cut the flowers and leaves from the stems. Trim down the stem portion but make sure you don't cut off the center piece (otherwise, your flower will lose the middle portion). TIP: use flowers that are somewhat flat so that the crown will rest closer to your head and not stick out too much. Flatter flowers will also be easier to glue on.
  5. Arrange your flowers + leaves: Planning ahead with the order of flowers helps to create the look you want. I try to mix up the colors so that no two same colors are right next to each other.
  6. Hot glue the leaves onto the wire first, making sure that you are gluing on the "outside" of the wire (not where it lays on your head). This will ensure that your flowers have something to stick onto.
  7. Hot glue the flowers on top of the leaves. Press the flowers on for several seconds to seal them in place.
  8. Continue gluing until you have covered the wire and are happy with the overall look. TIP: for mine, I layered the plum-colored flowers to add more dimension. Be creative!
  9. Place the crown on your head and tie the twine ends to secure it. 
  10. Prance around in your beautiful flower crown!
Darcie Moningka Photography
That's it! Easy and inexpensive crafts that look better than store-bought stuff are the best. Be sure to tag me in your photos so I can see your lovely flower crowns!
Darcie Moningka Photography
With grace in her heart & flowers in her hair,

P.S. My wonderful friend Darcie took photos for me. Check her out at darciemoningka.com!


Saturday, November 21, 2015

N+A Wedding 2015

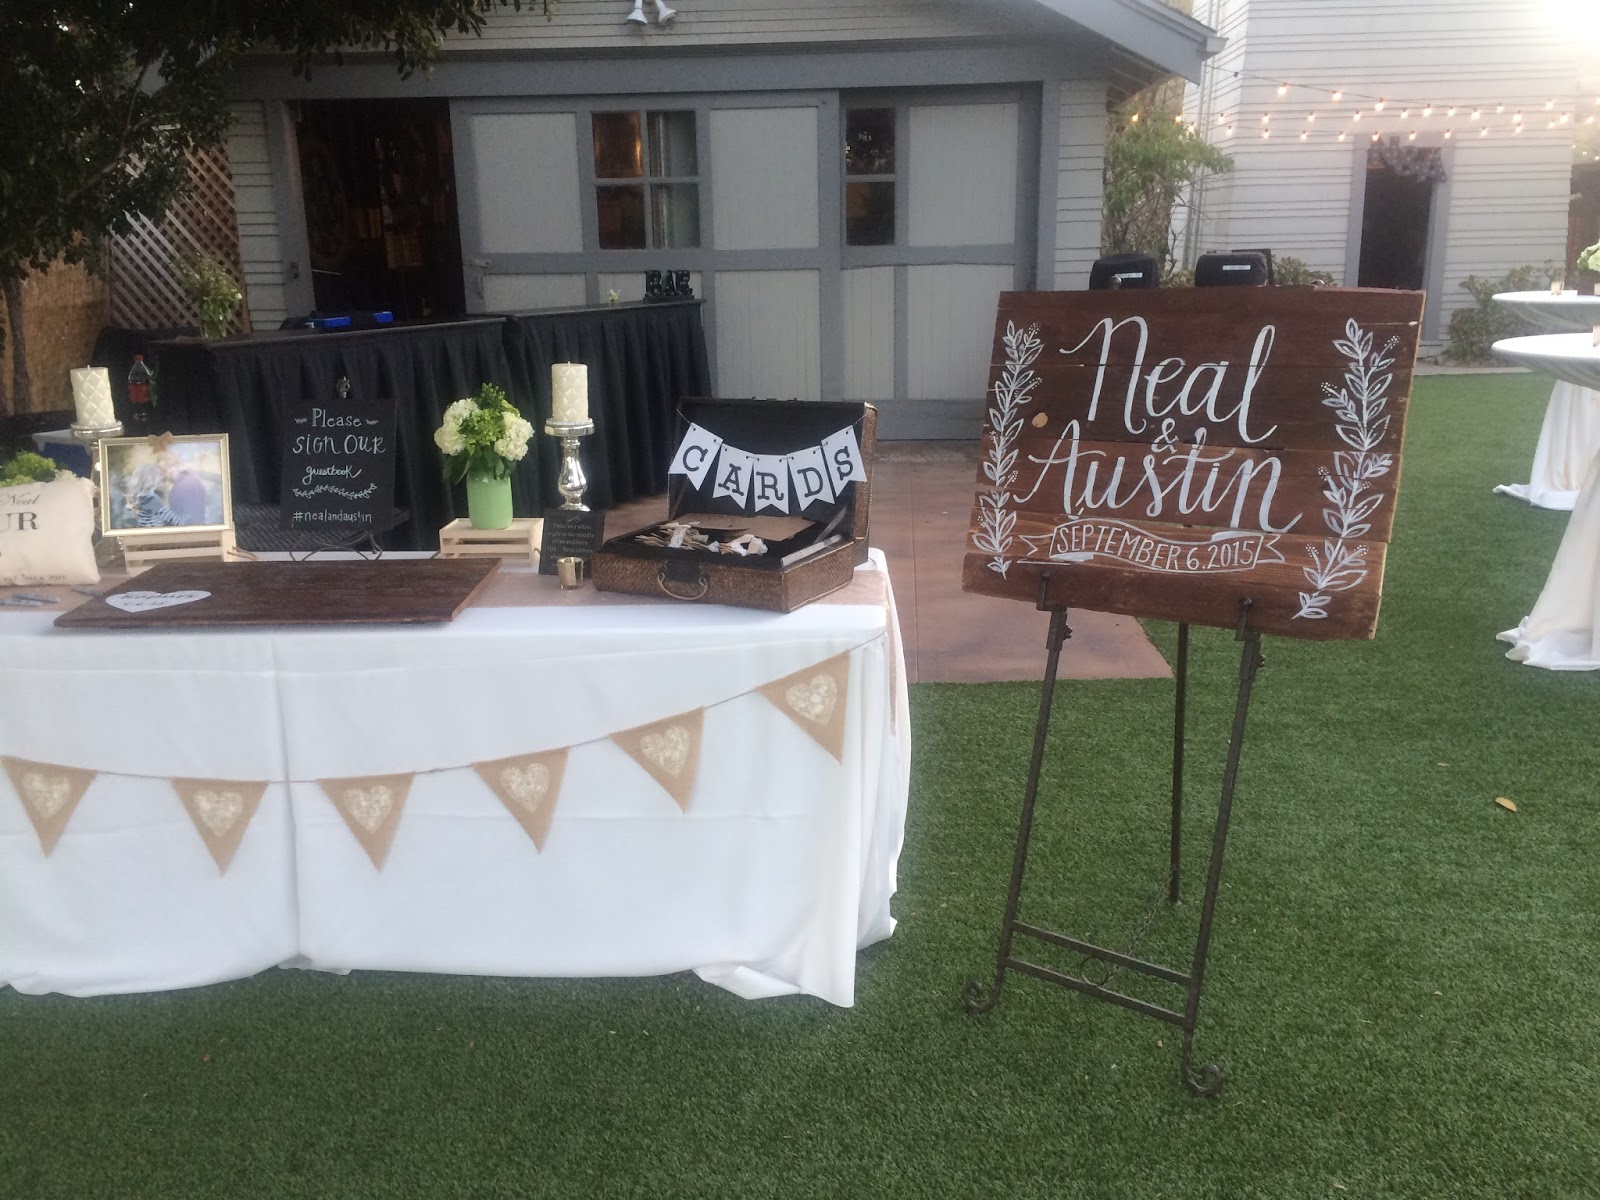
This past September, my Godbrother Neal and his beautiful wife Austin got married at a winery in San Juan Capistrano. It was a dreamy wedding, where vows of Christ-centered love were exchanged, happy guests danced under string lights, and sparklers lit up the grand exit. I was honored to do some lettering and signage for their big day.

My Godfather built this rustic wooden sign that welcomed guests to the adorable venue.

A simple original design for the groom's gift - a handmade book of their story.

The wedding program sign written on a vintage glass window.


I am excited to feature more weddings on the blog soon! And here is a verse I am meditating on today. May we love the people in our lives selflessly and out of the overflow of God's love for us.

John 13:34-35
"A new command I give you: love one another.
As I have loved you, so you must love one another. 
By this all people will know that you are My disciples, 
if you love one another."

With love,

Thursday, November 19, 2015

A+I Wedding Vows

These vows were custom-made for my friends who recently got married. I pray that you both experience unconditional love, immense joy, and deep grace through your marriage!


These vows will look beautiful framed and hung in their new home. A custom vows print makes a perfect anniversary or wedding gift! 


With love,


Sunday, November 15, 2015

Proverbs 31 - A Favorite Design

The Proverbs 31 woman: tender yet strong, hard-working yet humble. This original design from earlier this year is still one of my favorites because of the Scripture that it is based on. I've created canvas paintings, greeting cards, and hand-lettered prints with this design in hopes of sharing the power of this verse with others.


I encourage you to read this proverb today, whether you strive to be this woman or be with her.

Proverbs 31:25-31
"She is clothed with strength and dignity;
she can laugh at the days to come.
She speaks with wisdom,
and faithful instruction is on her tongue.
She watches over the affairs of her household
and does not eat the bread of idleness.
Her children arise and call her blessed;
Her husband also, and he praises her:
"Many women do noble things,
but you surpass them all."
Charm is deceptive, and beauty is fleeting;
but a woman who fears the Lord is to be praised.
Honor her for all that her hands have done,
and let her works bring her praise at the city gate."

The world needs more women of faith. May we be them, raise them, and love them well.

With love,


Saturday, November 14, 2015

Photo Calendar Collaboration Project

Hi friends!

So you may have heard that my friend Darcie and I did a little collaboration to create a 2016 Photo Calendar. I am obsessed with how beautiful it turned out!


Darcie is an amazing photographer and designer, so be sure to check out her website for more photos at www.darciemoningka.com. You can order a photo calendar as a gift or for yourself on her site here!

Thanks for supporting your local artists!

Cheers to creative collaboration,


Friday, November 13, 2015

Hello! A Little Introduction

Welcome to my blog! Thanks for stopping by - it really means so much to me because I love what I do and the clients I get to serve.


I want to start with a quick introduction so that you guys can know a bit about me! I'm a twenty-something grad student & artist from sunny California who is passionate about Jesus, loving people, and creating beautiful things. My hope is that God will be glorified and others will be encouraged by every piece of artwork that I make. 


So what exactly do I do? I specialize in making custom artwork for you or your loved ones. Many of my clients order signs for special events like weddings, home decor, or personalized gifts. I've done lots of canvas paintings, wooden signs, chalkboards, and card stock prints to frame, but I can write on pretty much any plain, flat surface that you want! If you have an idea or vision in mind, drop me a note and we can talk about how to make it happen. Pricing varies depending on the project, but check out my archive of past orders for more information.


Thank you again for reading and following! I appreciate it so very much!

With love,


Follow me on Instagram, Facebook, Bloglovin'!

<a href="http://www.bloglovin.com/blog/14562561/?claim=35b6p79mpdc">Follow my blog with Bloglovin</a>